Thursday, February 14, 2019

Valentines Day Fair

Hello all,
Sorry I have been MIA. I have been working on Valentines Day projects for a Valentines Day Fair.
Today I'm sharing some pictures of my projects and my set up at the fair.
Hope you enjoy them.
Here I am, the quiet before the storm.
I had a ssortment of chocolates in side my projects.

I also had Jelly Belly Jelly Beans on hand as well.'
Beleive it or not, everyone dose'nt like chocolate.
I make up for those who don't, chocolate is my weakness!

I made these mini bags with a mini Hershey chocolate bar inside. 
I had a man buy 20 of them, one for each person on his team. 

My table was not that big but I made it work.

I'm very happy with the way my stuff was displayed.
Good thing I brought my cart too.

My cart held some of my kits, catalogs and a raffle prize drawing for a Paper Pumpkin Kit.

These Heart Boxes were a big hit, There were 3 hershey nuggets inside.

These were from a paper Pumpkin kit I had not used.
I filled the bags with Jelly Belly Jelly Beans.

These cute boxes I created held three Lindt Chocolate Truffels.

Inside these were either a Dark Chocloate Marshmellow, Carmel or 
Strawberry Champagne Russell Stover Heart.

I used a lot of Hershey Nuggets in my projects and I ate a lot of them as well.
Like I said I love chocolate. I needed to create fast so I would stop eating them.

Here is another Hershey Nugget project.

These are some more of the hearts I made. I cased these from Stampingbae.
I hope you had a great Valentines Day and was able to spend it with someone you love!


Thursday, February 7, 2019

Sweet Stampede Blog Hop- Sale-A-Bration

Thanks for hopping over from Stamping with Heather, her project was awesome right?
I love being part of the Sweet Stampede Team, we have some very talented people on our team. Please continue to follow the blog hop so you can see every project created using Sale-A-Bration Items.
Today I am sharing a Gift Box and Card I made for a friend,
That is always there for me! I can always count on her. 
I wanted to say thank you and give her a little surprise.
My box contained a bracelet.
 I used the Butterfly Gala Bundle.
This gift box is easy to make and can hold a lot of goodies.
I started out with a piece of 8 1/2" x 9 1/2" Basic Black Cardstock. I scored the long side at 2 3/4" and 6 3/4", then scored the short side at 2 3/4" and 5 3/4".
Cut the score lines up, then cut the flaps diagonially. 
This is what your piece of cardstock will look like after cutting it.

Adhere the flaps to the inside to form the box, like the picture shows.


I have used the Botanical Butterfly DSP for the lid.
I used a 5" x 6" piece of  DSP,
scored the longside at 1" and 5", then the short side at 1" and  4". 
Cut the tabs up and assembled.

I then cut out a Basic Black Scalloped Oval and a Whisper White Oval.
Layered them together, I stamped the sentiment in Highland Heather Ink.
I stamped the Butterfies in Memento Black Ink, punched them out with the Butterfly Duet Punch. Then colored them in with Highland Heather and Balmy Blue Stampin' Blends.
I added some wink of stella to the butterfies to give them some bling.
I finished the gift box off with a Highland Heather bow. You can earn the ribbon for free with a qualifying purchase. The ribbon comes in a combo pack with 5 rolls of ribbon.

During Sale-A-Bration, with a qualifying order you can earn the
 Botanical Butterfly Designer Series Paper. You can also use the punch on some of the papers.

My 2nd project uses that beautiful DSP and does all of the work for this simple card.
I started out with a 8 1/2"x 5 1/2" Basic Black card base and folded it in half.
I then cut a piece of the Botanical Butterfly DSP 3 3/4" x 5", I colored in two of the Butterflies using Light and Dark Highland Heather and Daffodil Delight Stampin' Blends. 
I adhered it to the card base using Snail Adhesive.
The other two Butterflies I punched out from another sheet of the DSP and attached to the card using Stampin Dimensionals. They look like they are flying, don't they?
I stamped the sentiment in Highland Heather ink on Whisper White Cardstock and cut it out using the new Rectangle Stitched Framelit Dies. and adhered that to the card using Stampin Dimensionals.
I love the Rectangle Stitched Framelit Dies! There are 13 different size rectangles.

Don't forget the inside of your card.
I Stamped the sentiment and Butterflies in Memento Black Ink and Colored the Butterflies in with Light and Dark Lovely Lipstick Stampin Blends.

I hope you liked today's projects.
 Click the next button and see Debra's project, I know you'll love it!
Thanks for stopping by my blog today.


You can see some more Sale-A-Bration projects from the Sweet Stampede Team

1.Heather Guerrero 
2.Lisa Cunningham (You are here)
3.Debra Harrison
4.Erica Cerwin 
5.Antoinette Randazzo-Bay 
6.Alessandra Loiacono 
7.Tiffany Almeida 
8.Britney Vanderlaan

Wednesday, February 6, 2019

February All Occasion Card Class

My All Occasion Card Class for February is created and ready for you to register,
Come and have fun making 8 cards 2 each of 4 different designs, envelopes are included.
Date: Friday February 15th
Time: 6:00-8:00pm
Cost : $20 or Free with a minimum purchase in my online store.
All classes are held in Fremont CA.
To register for the class email me at lcdesigns1@comcast.net
Bring a friend and get a gift from me.

Saturday, February 2, 2019

Hey Love Projects

Yesterday was the last day of my Projects using the Hey Love Stamp Set
Here is a recap of what I did this week.
I started the week off with my cute Ape card.

Then I made my Pop Rock Treat Holder featuring the Cute Skunk LOL

On Thurday I made a pillow box featuring the Alligator!

I finished the week off with the cute Otter, You Otter be my Valentine!
I love all of the critters in this stamp set, there are some that I did not even use too. 
You can use them for any occasion just change the sentiments. 
I hope you enjoyed my product of the week.


Friday, February 1, 2019

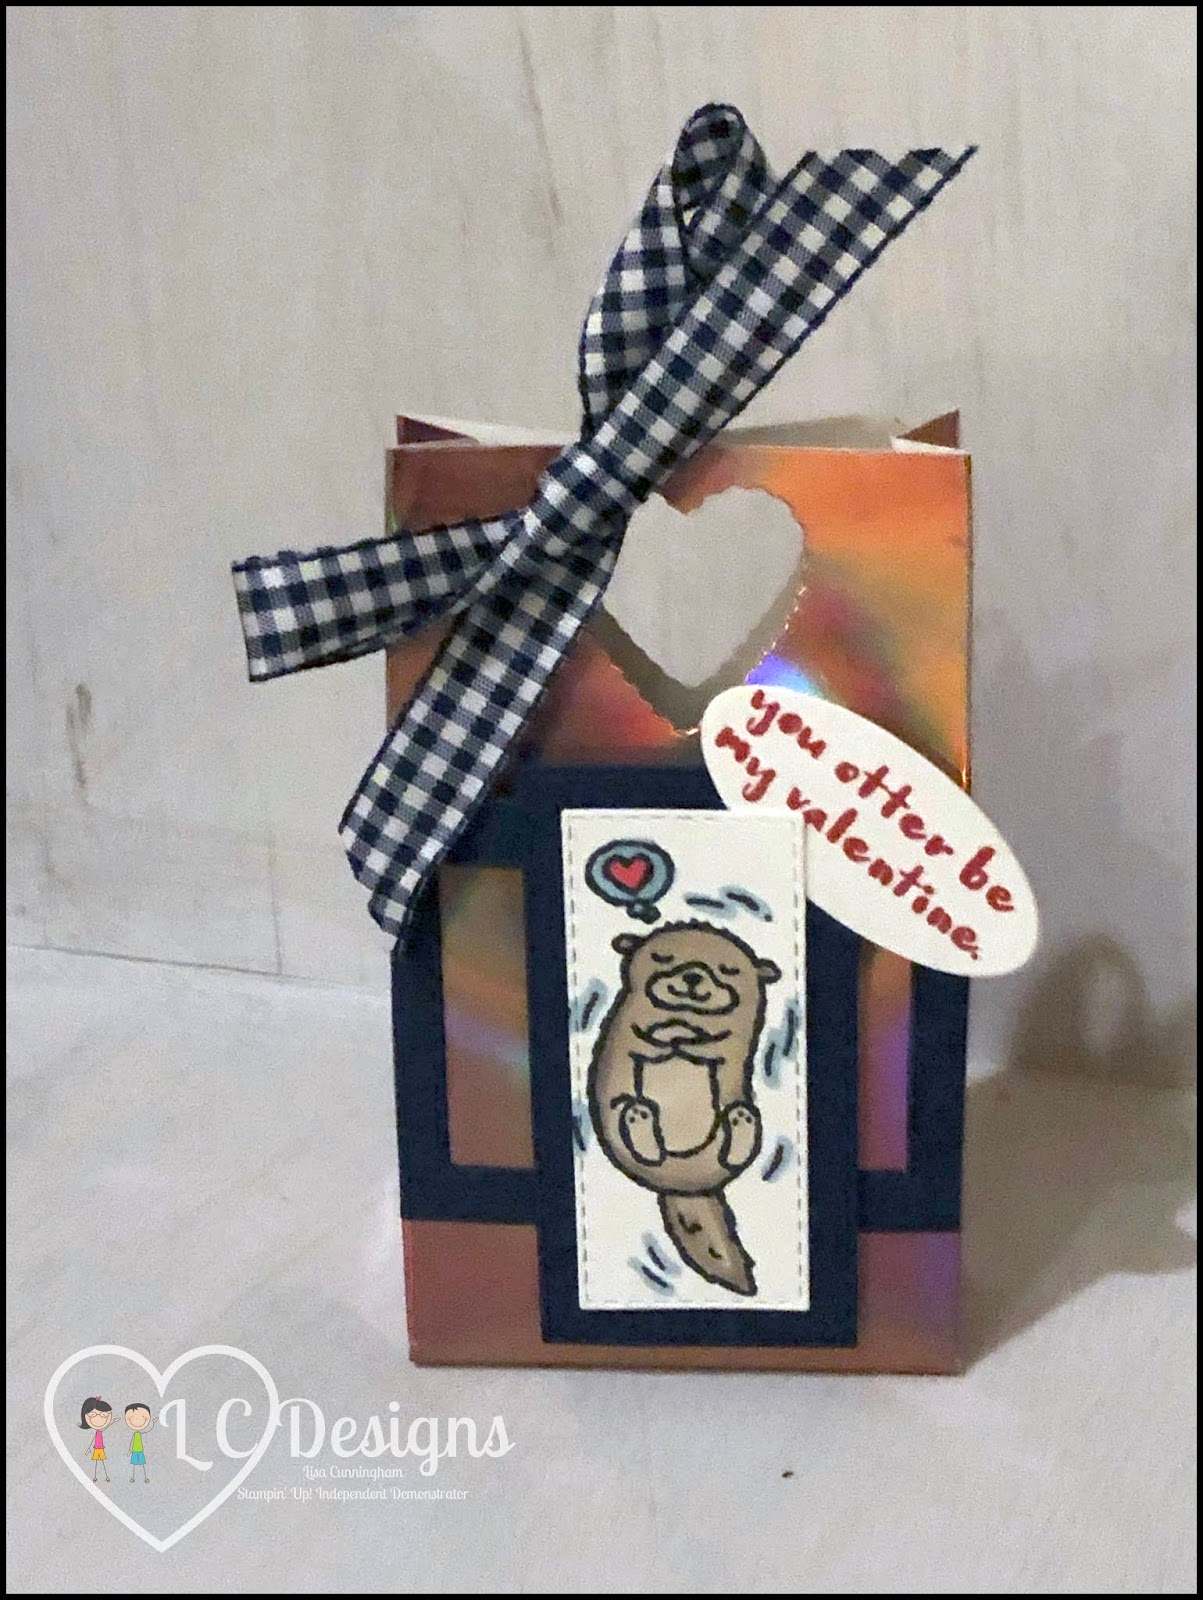
Hey Love Mini Treat Bag

Hello all,
Today I'm featuring my product of the week The Hey Love Stamp Set.
I am using the cute Otter on my project.
I made these treat bags for my grandchildrens teachers. 
We filled them with assorted Valentine chocolates.
The foil paper was hard to photograph, so I took a picture with the flash here and one without the flash at the bottom. This paper is really beautiful, it changes colors.

I started out with a 5 ¼" x 7 ½" piece of Grapefruit Grove Foil sheet. I scored the short side at 1", then scored the long side at ½" , 1 ½" , 4" and 5".
I used the small heart from the Be Mine Framelits and cut out a heart on each side, to create the handle.
I cut the score lines (below the 1" score line) on the long side up to the 1" score line. Then cut out the small square out. I cut each tab at a angle. See photo below.

Add tear and tape to the long tab and secure to the other end. Fold the bottom tabs in and adhere with tear and tape.

I stamped the otter using Memento Black ink and colored him in using the Light and Dark Crumb Cake Stampin Blends. I used the Light Real Red for the heart and Dark Balmy Blue for the thought bubble and watermarks. I cut him out using the Small Stitched Rectangle Framelit, I cut the next size larger out in Night of Navy and layered the two together. With the negitive piece I created the frame, I cut the frame to fit the size of the treat bag and glued it to the bag. I then added the Layered Otter to the bag using Stampin' Dimensionals.
I stamped the sentiment on Whisper White cardstock in Real Red ink and cut it out using the smallest Oval Framelit and adhered it behind the Otter with a Mini Stampin' Dimensional.
To close the Treat bag I threaded Night of Navy Gingham ribbon through the hearts and tied a bow.

Product List

Fun Fold Friday-Graduation Card

Hello! Welcome to Fun Fold Friday! Every Friday I post a video at 12:00pm on my Facebook Page and YouTube channel .  Today I made a fun fol...