This blog has been designed to showcase my projects, with the hopes of inspiring others to be creative and create beautiful projects using Stampin' Up! products. Class announcements and special offers will be posted frequently
Today I have yesterday's Coffee & Crafts video for you.
I made three adorable St. Patrick's Day treat holders. I used various stamp sets & dies.
You can receive the make & take packet to make all three projects just by spending $35 in my online store before tax and shipping, by 3-12-25. Use the shopping link or QR code below.
Three adorable projects!
How adorable is this leprechaun hat?
The pot of gold! Oh my!
And this box!!
Click on the video to see how I made these treat holders.
Join me every Sunday at 8:00am over on my Facebook group.
The content in this blog is the sole responsibility of Lisa Cunningham as a Stampin' Up! ® Independent Demonstrator. The use and content of classes, services or products offered are not endorsed by Stampin' Up! Images @ Stampin' Up! ® 2025
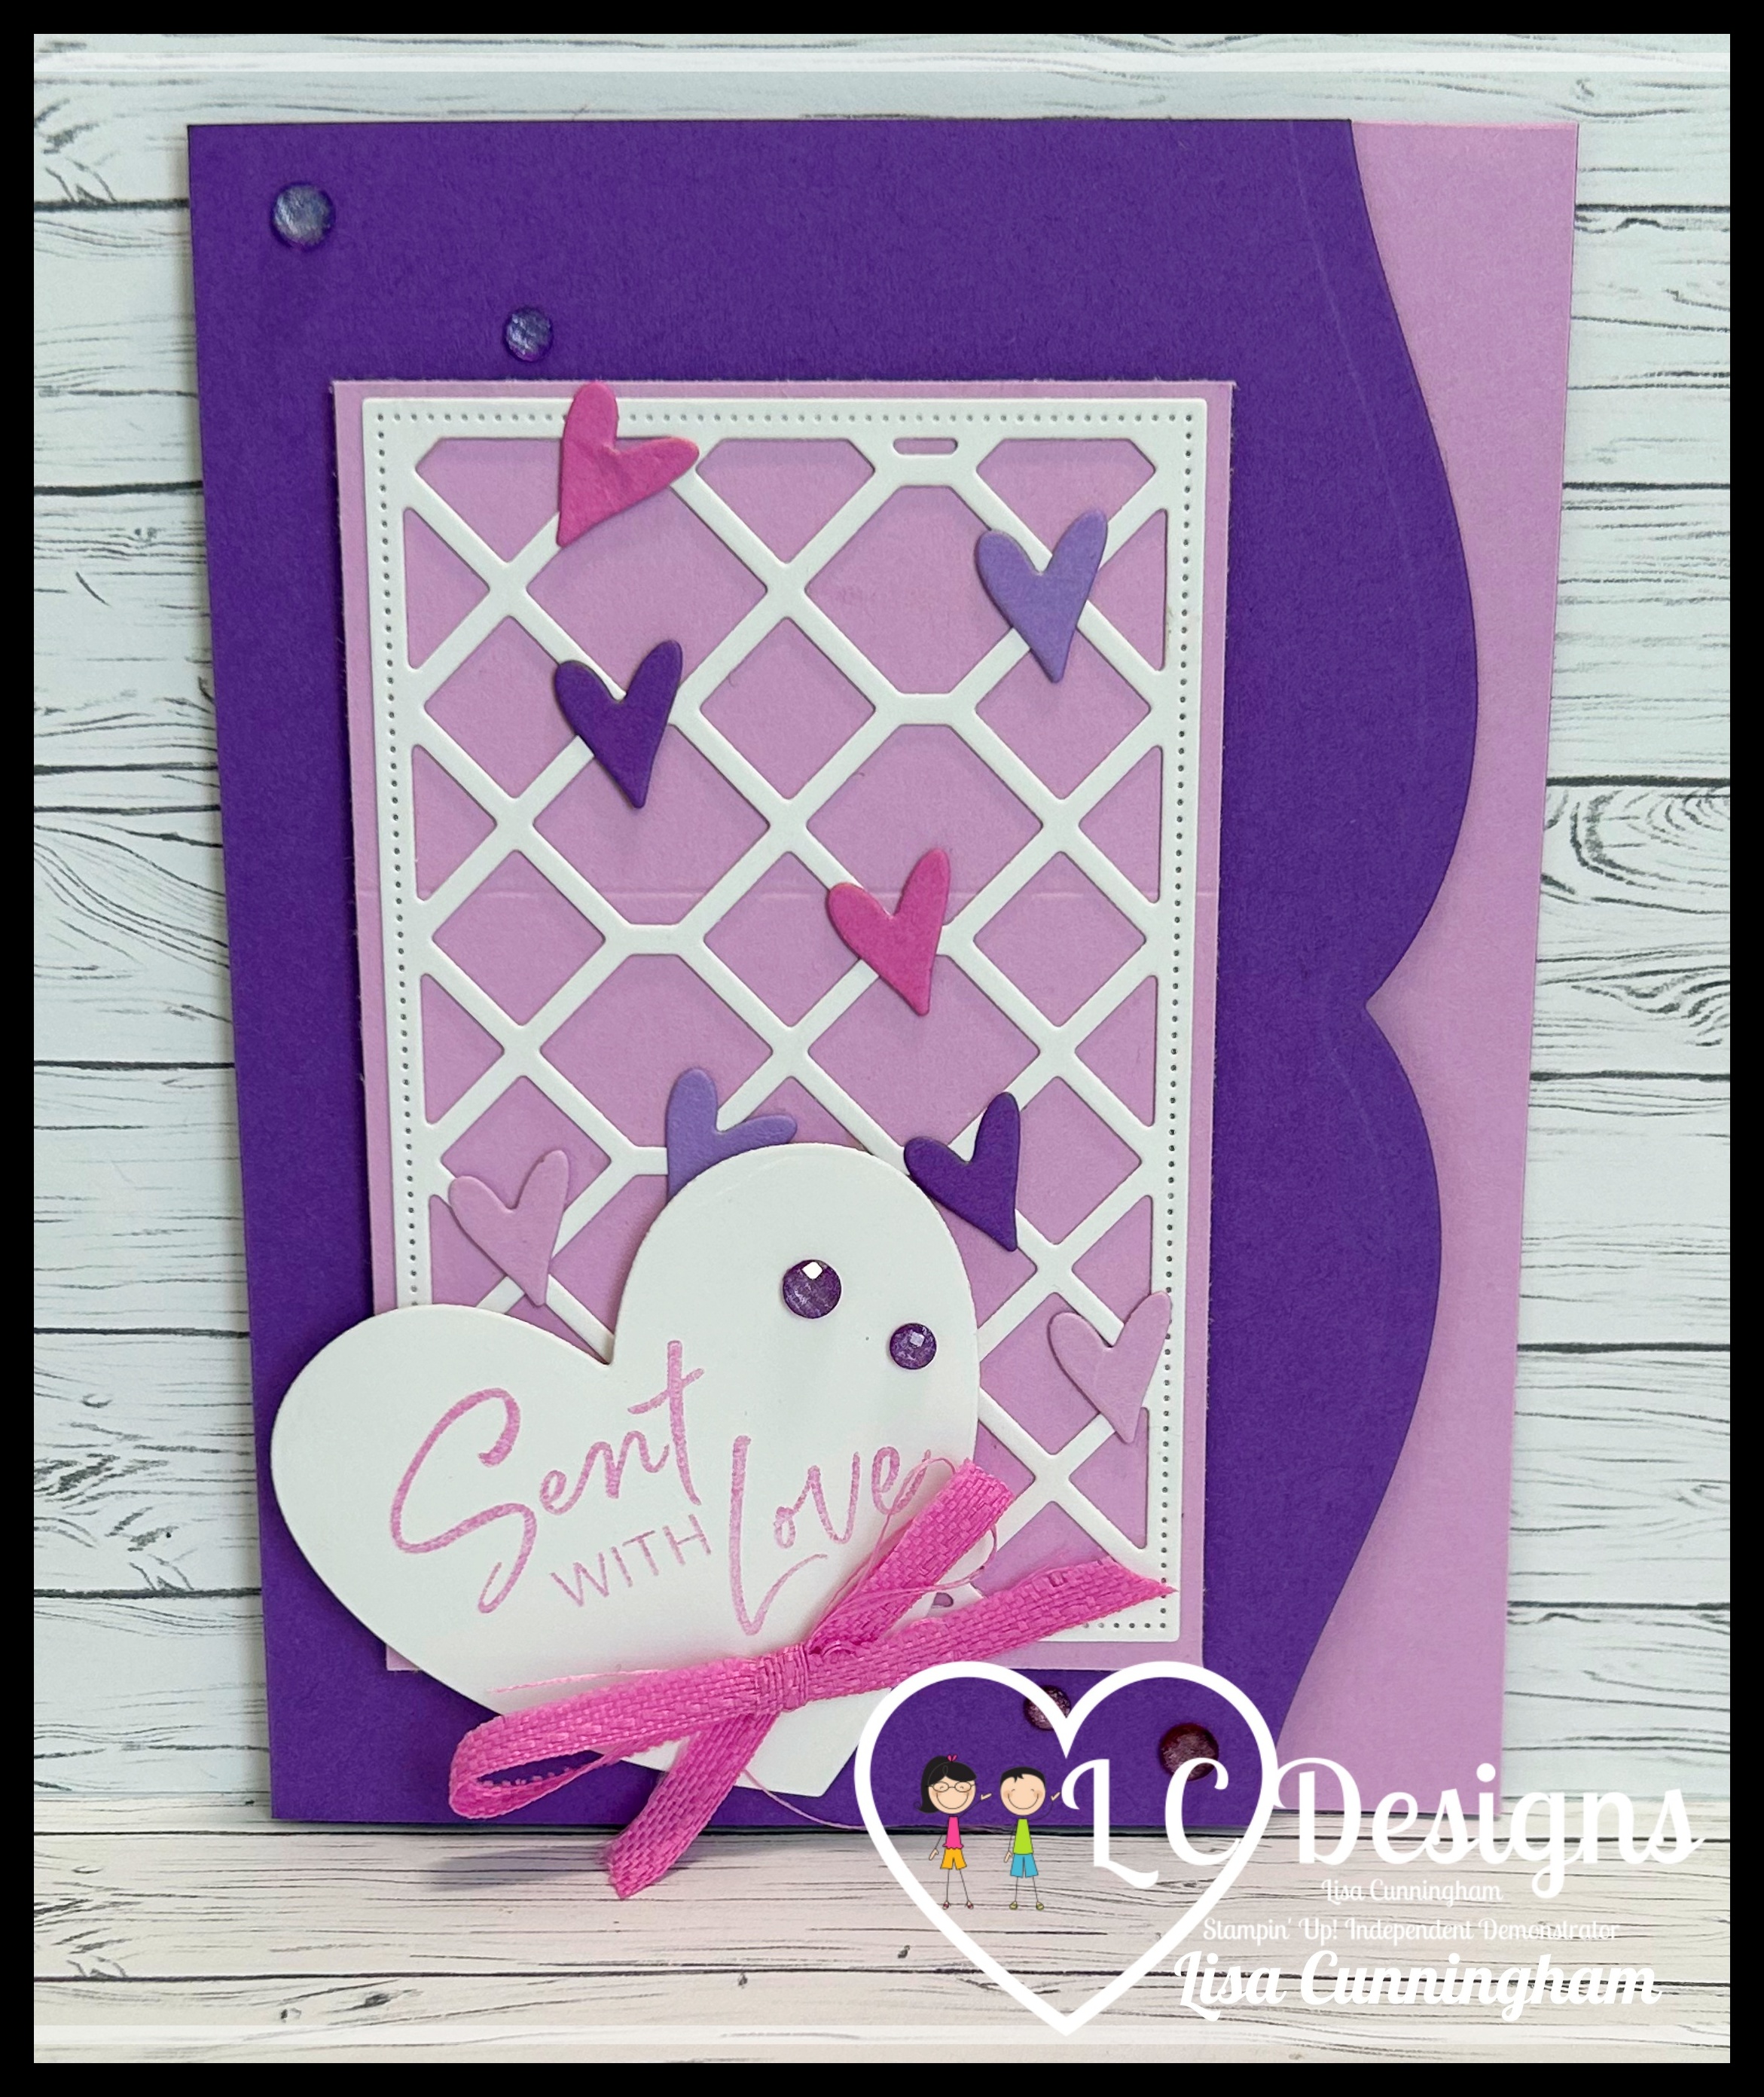
I die cut the lattice from basic white cardstock using the Linked Together dies and layered it to a 2 3/4" x 4 1/8" piece of Fresh Freesia cardstock.
I glued the hearts to the lattice. I adhered the layered piece to a Gorgeous Grape card base that I die cut with another Fancy Border die.
I stamped the sentiment in Fresh Freesia ink on Basic White cardstock and die cut it with the Hearts of Elegance die. I added it to the card using Dimensionals.
I tied a Petunia Pop ribbon bow, that I cut in half lengthwise and added it to the heart.
I finished it off with adding some Purple Fine Shimmer Gems.
Can you believe I made 3 cards from the negatives from the heart border die? So fun right?
I added a piece of Fresh Freesia to the inside to make that border die cut stand out.
The content in this blog is the sole responsibility of Lisa Cunningham as a Stampin' Up! ® Independent Demonstrator. The use and content of classes, services or products offered are not endorsed by Stampin' Up! Images @ Stampin' Up! ® 2025
Remember the card I made yesterday? Well today I'm using some of the negative hearts and dots from the strips of cardstock I die cut. I used the new online exclusive bundle Fancy Borders.
I glued the hearts and dots from my strips of cardstock onto a 5 1/4" x 4" piece of Basic White cardstock. I adhered that to a Gorgeous Grape card base.
I Stamped the sentiment in Highland Heather ink on basic White cardstock and punched it out with the Hexagon punch.
I added some Petunia Pop ribbon to the card front then added the sentiment using Dimensionals. So easy!
Come back tomorrow to see how I use more of the hearts from the border die. I have one more card for you.
I love the all the different shades of purples hearts.
The content in this blog is the sole responsibility of Lisa Cunningham as a Stampin' Up! ® Independent Demonstrator. The use and content of classes, services or products offered are not endorsed by Stampin' Up! Images @ Stampin' Up! ® 2025
Today I have this past Sunday's Coffee & Crafts video for you.
I made three fun fold cards using the beautiful Everyday Happiness DSP, it's located in the scrapbook brochure. I also used the New He's The Greatest and She's the Greatest stamp sets. (available today)
You can receive the supplies to make all three projects just by spending $35 in my online store before tax and shipping, by 3-5-25. Use the shopping link or QR code below.
Three fun fold cards, just for you!
The Everyday Arches Dies are the best! Along with the Happy Hibiscus bundle.
I love that we finally have a PAPA stamp!
She's the greatest has so many options to create personalized cards.
Click on the video to see how I made these fun fold cards.
Join me every Sunday at 8:00am over on my Facebook group.
The content in this blog is the sole responsibility of Lisa Cunningham as a Stampin' Up! ® Independent Demonstrator. The use and content of classes, services or products offered are not endorsed by Stampin' Up! Images @ Stampin' Up! ® 2025
Welcome to March and another Sweet Stampede Blog Hop!
This month's theme is a color challenge. We are using Melon Mambo, Daffodil Delight and Granny Apple Green in our projects. To be honest this was a struggle for me. I usually grab the colors that are in the Designer Series paper that I'm going to use and go from there.
I love the bright colors!
I used the New online exclusive Textured Notes Bundle. It will be available starting March 4th!
I wanted to create a fun fold card this month.
The colors are so bright and cheery! This card was so fun to make!
When I glued my piece on, I lined it up with the Basic White piece and made sure I covered up the stamped image on the inside. If you don't have a stamped image on the inside you can add it to the center of your card.
I added glue to a 1" section of the cardstock and held it until it dried then I opened it up and added glue to the back 1" section and held it until it dried.
So fun, right? Will you try this fun fold?
The NEW Textured Notes Stamp Set & Dies
Textured Notes Stamp Set
Textured Notes Dies
Measurements/instructions for this card:
5 1/2" x 11" Daffodil Delight cardstock. Score the long side at 1 3/4", 3 1/2" 5 1/4" and 7".
1 5/8" x 5 3/8" Brights DSP, 2 pieces striped pattern Melon Mambo & 2 pieces striped pattern Granny Apple Green. Glue to the first 4 panels.
5 1/4" x 3 3/4" Basic White. Die cut with the 2nd to largest Textured Notes rectangle, be sure to center the die on the cardstock. Glue the frame to the inside of the card base. Stamp the leaves in Granny Apple Green on the die cut piece in the bottom right corner. Glue that inside the frame.
2 7/8" x 2 7/8" Granny Apple Green & Melon Mambo cardstock
2 5/8" x 2 5/8" Granny Apple Green & Melon Mambo cardstock layer these pieces to the two previous pieces alternating the colors.
2 3/4" x 2 3/4" Basic White cardstock (2). Stamp the smaller leaves in Granny Apple Green ink on one of the squares and "a little note of appreciation" in Melon Mambo ink. Stamp the weaved circle several times on the other square then "Thank You" in Melon Mambo ink. Adhere these squares to the layered squares.
3" x 6" Daffodil Delight cardstock, score the long side at 3". Glue the layered squares to this piece. See how to glue this piece to the card base in the pictures above.
Add some Iridescent Gems to the front of the card
Tie a piece of Iridescent Ribbon in a knot and add to the card using a Mini Glue Dot.
Now let's hop on over and see what Rubina has created
The content in this blog is the sole responsibility of Lisa Cunningham as a Stampin' Up! ® Independent Demonstrator. The use and content of classes, services or products offered are not endorsed by Stampin' Up! Images @ Stampin' Up! ® 2025